
My life is not a madcap adventure – unless I set out to complete a Do-It-Yourself project. The stress begins when I realize I don’t have working tools. It multiplies when my clumsiness gets in the way of measuring, gluing, hammering and balancing on chairs to mount things on hard-to-reach places. Sometimes I sit down to reflect on why I am doing this to myself, and recoup by thinking about the benefits these projects could bring into my life: convenience, cuteness and practicality. Despite the challenges I faced, and the sad consequences my projects brought (super glue on my favorite T-shirt, a sore thumb from hammering with poor aim and nightmares about knots untangling in the middle of the night), I survived. And now, my Pacific Grove apartment is adorned with useful hacks.
All three projects cost less than $60 in total, the materials were purchased at a variety of local stores and they were easy enough for me, a novice DIYer.
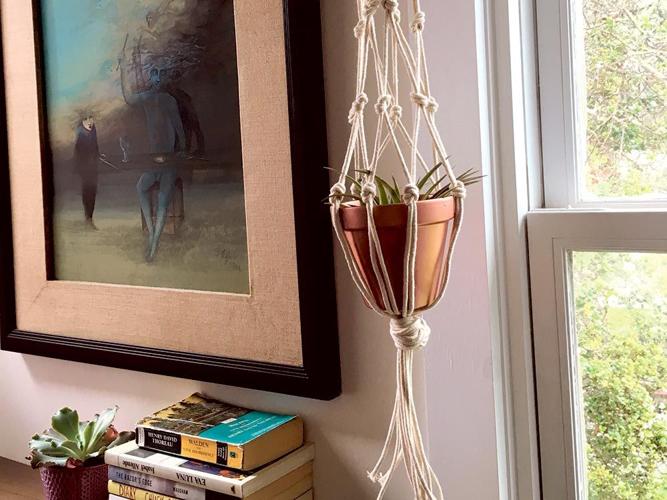
Hanging Air Plant

I enjoy seeing green in my living space. Unfortunately, I don’t have a green thumb or an outdoor yard. However, there are ways around that and for me, succulents and air plants are basically it. These plants are easy to maintain, need little water to survive and thrive in bright, indirect light. This DIY looks terrifying thanks to all the knot tying involved, but it’s simple. Trust me.
What you need: Air plant of your choice (I bought mine at Crafted on Lighthouse Avenue in Monterey), a small plant pot, a hoop or hook, and twelve strips (about 3’-4’ long) of your chosen cord/rope.
Instructions:
1. Lay out the ropes on a flat surface and divide the 12 lengths into six pairs. Knot each pair about 15 inches from the top.
2. Grab the tail of one knot and another tail from the neighboring knot and tie those together to create a similar knot about 4 inches below the original knot.
3. Repeat this step one more time. Ultimately you will have three tiers of knots, and each level should have six knots. (See side picture.)
4. To test the size of your pot, meet the base of the pot with the lowest knot level, and use what’s left of the rope and do a simple, tight twist. This will be the support of your pot when it hangs, so again, make it tight.
5. Do a similar twist with the top of the rope and tie it around a small hoop or hook.
6. Hang from a window, shelf or ceiling.
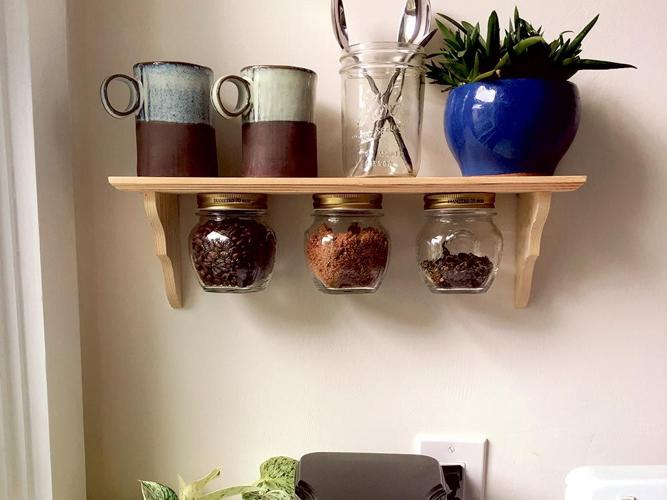
Small Kitchen Coffee Station

I am a young professional and, in order to function, I need coffee. It was only natural that my home would need a practical coffee station. So I scoured the internet for ideas. Very few caught my attention, but then I stumbled upon this shelf/mason jar godsend that takes less than two hours to complete. Now, my mornings are more caffeinated and I have a new favorite apartment nook. Tip: Pour sugar, tea and coffee beans in the jars.
What you need: Three medium jars (I bought mine at Target), a short shelf (purchased at Beverly’s Fabric and Crafts), five-minute epoxy glue, screws and D-rings (Pacific Grove Hardware).
Instructions:
1. Glue the tops of your jars beneath the shelf. In order for them to stick better, you will want to be generous and brush the glue around the rim, not the middle. Make sure to measure the shelf before and center the middle jar – for symmetry purposes.
2. Wait about an hour for the glue to dry and then screw in your jars, with their contents. (Maybe on the first try see if the glue holds and place some pillows below the shelf, to avoid shattered mason jars on the kitchen floor. Not that I would know anything about that.)
3. Mount the shelf above the counter where you keep your coffee maker to achieve coffee central greatness.
4. On top of the shelf you can put mugs, plates or another jar with stirring utensils and napkins… we all know coffee stations can get messy.
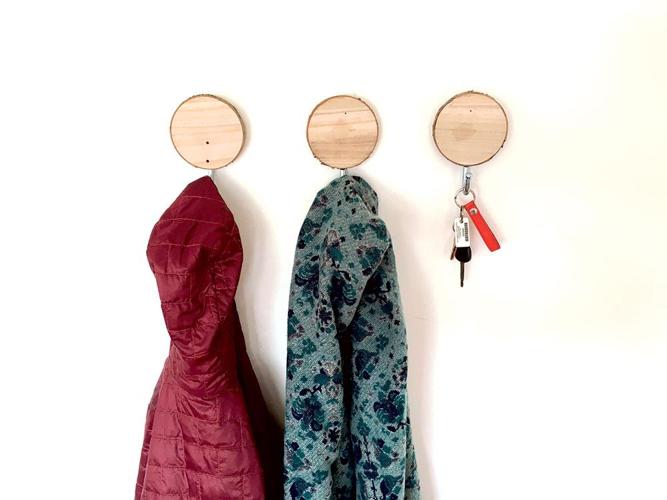
Wood Slice Key/Coat Hanger

Everyone has that one friend who can’t ever find their keys. I am that friend. That’s at least in part because I don’t have an assigned place to hang my keys, so every day my keys end up in a different spot. One day I found them inside my fridge. This next project is inexpensive and adds a rustic feel to your home. Note: Beware of flying super glue because it will ruin your favorite T-shirt.
What you need: Three tree bark slices (Beverly’s), hangers/hooks of some kinds, screws, D-rings, a drill and a screwdriver (P.G. Hardware).
Instructions:
1. To figure out where the hooks should go, hold the wood slice and rotate until you find the position your wood slice should face.
2. Make marks for the screws on the uglier side of the wood slice, because duh, to know where to drill in.
3. Use a drill, or in my case borrow a drill, to make room for the screws. Make sure to not go too far back or you will penetrate the wooden slice. Note: Mine went through – twice.
4. Grab a screwdriver and tighten the hook onto the wooden slice with some screws.
5. Follow the same steps for the D-ring, which should be placed directly above the hook.
6. Mount the wooden trio in a straight line and prepare to never lose your keys and have your jackets handy.


(0) comments
Welcome to the discussion.
Log In
Keep it Clean. Please avoid obscene, vulgar, lewd, racist or sexually-oriented language.
PLEASE TURN OFF YOUR CAPS LOCK.
Don't Threaten. Threats of harming another person will not be tolerated.
Be Truthful. Don't knowingly lie about anyone or anything.
Be Nice. No racism, sexism or any sort of -ism that is degrading to another person.
Be Proactive. Use the 'Report' link on each comment to let us know of abusive posts.
Share with Us. We'd love to hear eyewitness accounts, the history behind an article.